


This article shows how to add a thermal receipt printer from a brand outside Qoyod’s list in the Android POS App, check that it is connected, and run a test print before you rely on it. Results vary by printer model, and Qoyod cannot guarantee how printers outside its list will perform.
Path in POS
Settings › Printing Settings › Printer Configuration › Add Printer
Before you start
- The option is on the Android POS App only, on all POS plans. Web POS prints through the browser.
- Switch the printer on and load paper. Then join it to the same network as the device, or pair it in the Android Bluetooth settings.
- A USB cable does not work with this option.
- It is meant for thermal receipt printers that use the common ESC/POS standard and can print pictures. It is not for office printers or label printers.
Steps
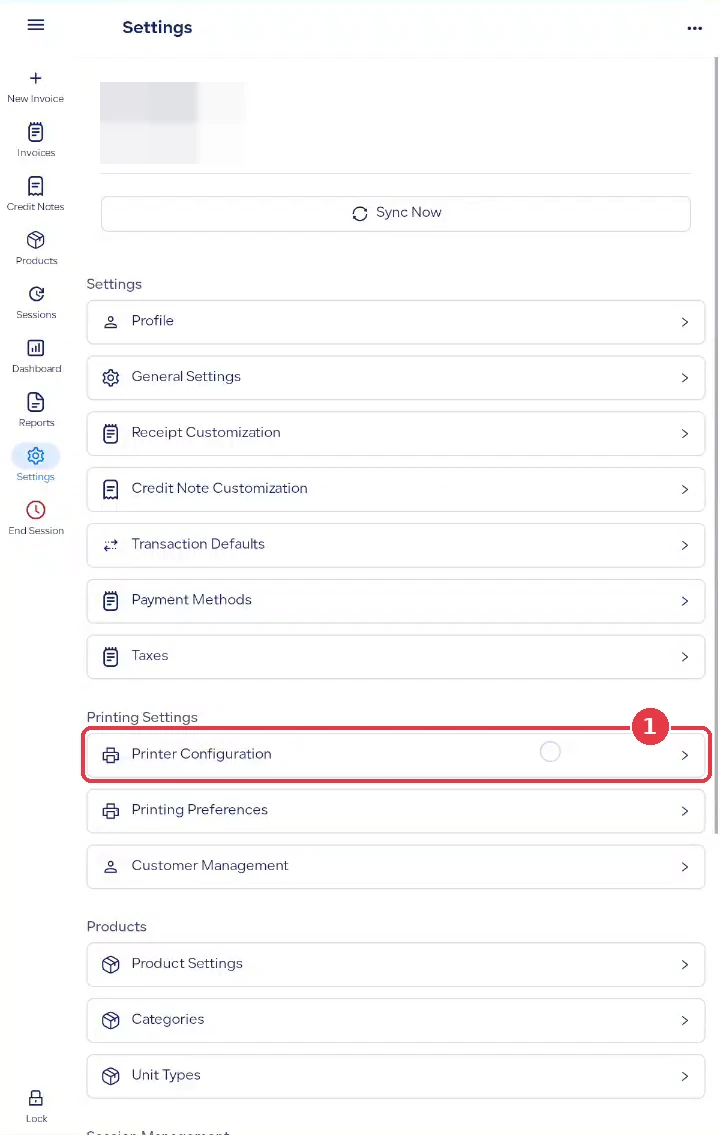
- Open Settings, then Printing Settings, and tap Printer Configuration. If no printer is saved yet, the Add Printer form opens. Otherwise tap New Printer.
 View full size
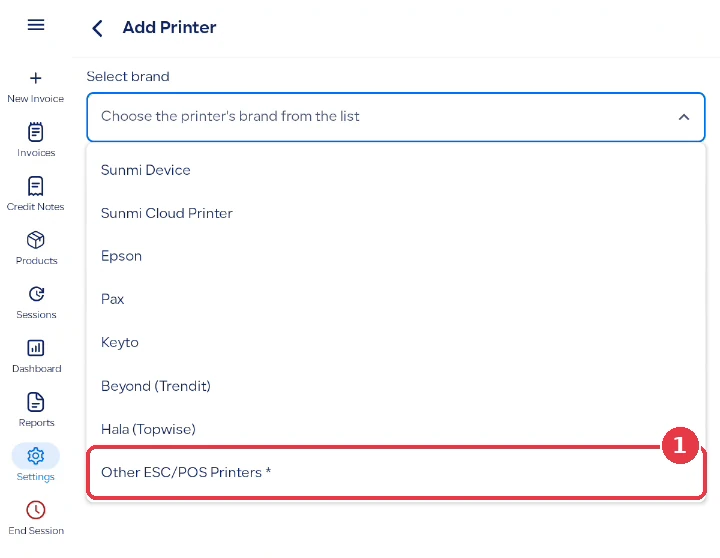
Step 1: Printer Configuration under Printing Settings. - In Select brand, choose “Other ESC/POS Printers”. It is the last item in the list.
 View full size
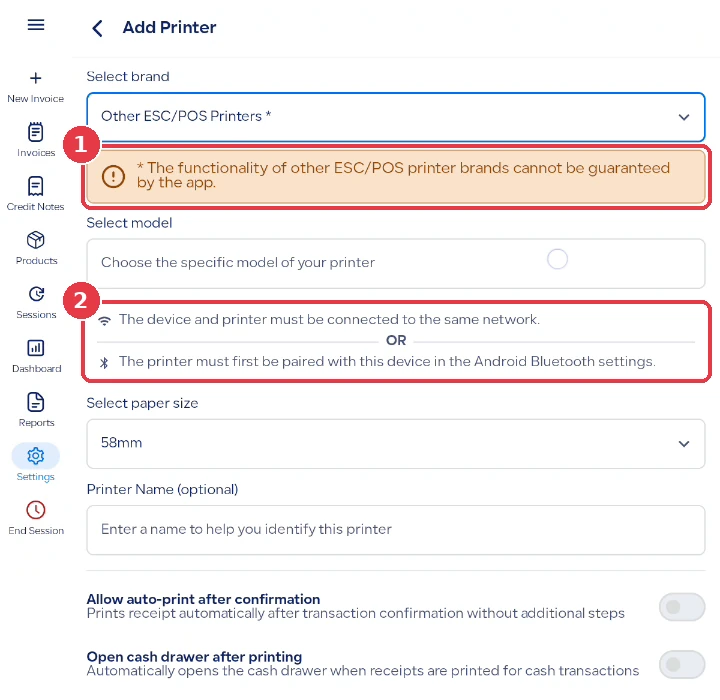
Step 2: the new option at the end of the brand list. - Read the notice the app shows: “* The functionality of other ESC/POS printer brands cannot be guaranteed by the app.” Then make sure the printer is on the same network or paired over Bluetooth.
 View full size
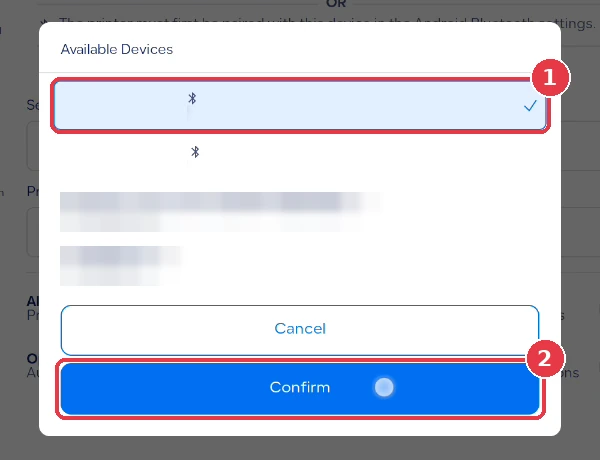
Step 3: the notice and the connection tips for the shop network or Bluetooth. - Tap Select model and allow the access the device asks for (location and nearby devices), which the app needs to look for printers. Choose your receipt printer from Available Devices, then tap Confirm. The list shows every paired Bluetooth device and every printer found on the network, so pick the receipt printer by name.
 View full size
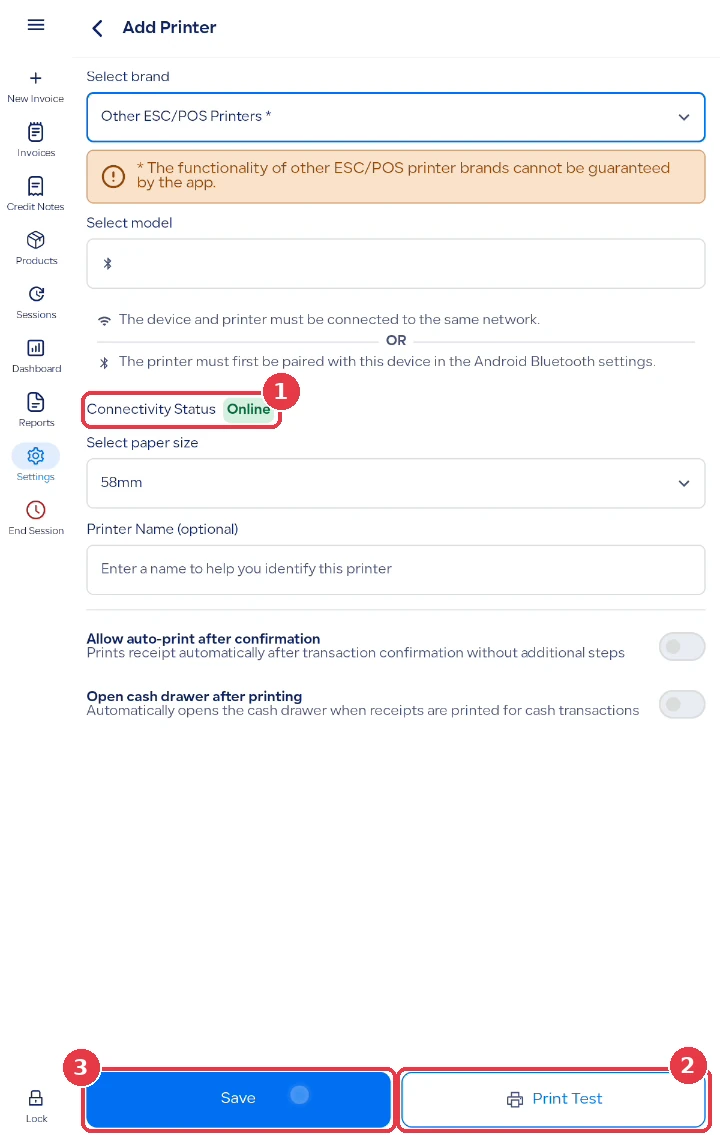
Step 4: choose the printer from Available Devices. - Wait for Connectivity Status to show Online. Choose the paper size, 58mm or 80mm, and a printer name if you want. Tap Print Test and look at the paper, because the app does not tell you whether the test page came out. Then tap Save. While the printer is offline the app shows “Cannot save. Printer must be online.”
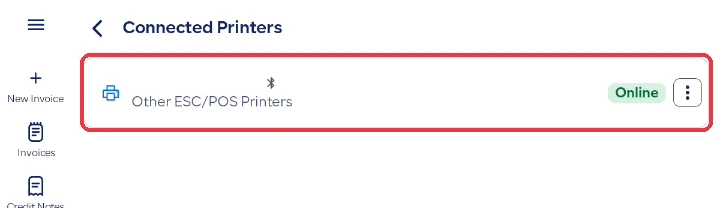
View full sizeStep 5: Connectivity Status, Print Test and Save. - Find the printer under Connected Printers, listed as “Other ESC/POS Printers” with its status. Make one real sale and check the full receipt before you rely on it. The test page is short and does not show Arabic text or the invoice QR code.
 View full size
Step 6: the saved printer under Connected Printers.
Fields
- Select brand: choose “Other ESC/POS Printers”.
- Select model: where you pick the printer from Available Devices.
- Select paper size: 58mm or 80mm.
- Printer Name (optional): a name that helps you tell printers apart.
- Allow auto-print after confirmation: prints the receipt by itself once the sale is confirmed.
Notes
- Sales receipts, return receipts and the session and daily reports print in the same design as on the listed brands, and printing does not need an internet connection.
- The app keeps checking the printer and reconnects when it comes back. If it is unreachable the app shows “Printer is offline”. It cannot tell when the paper runs out or the cover is open, so keep an eye on the paper as with any receipt printer.
- Add each printer on the device that will print to it. A second device needs its own setup.
- For printing you can count on every day, choose one of the listed brands: Sunmi, Sunmi Cloud Printer, Epson, Pax, Keyto, Beyond (Trendit) and Hala (Topwise).